vDrive documentation
vault56 vDrive is a virtual drive software that lets you create local drives that are directly connected to vault56 Cloud Storage buckets.
This is a complete replacement for a NAS or a file server and can be used to share buckets among individuals, for example in an office or across offices.
Install vDrive on Windows (version 7 - 11)
- Download and install the WinFsp driver package by clicking here.

- Download and install the vDrive installation package for Windows (7-11) by clicking here.
A Window may appear that asks you if you want to install vDrive.

Click on "MORE INFO" as illustrated in the image. Then double check that the Application is vDriveSetup.exe that you downloaded and press "RUN ANYWAY"

Then click YES when Windows asks you for permission to install.
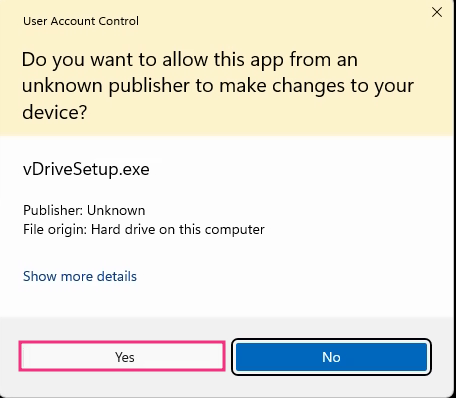
Then click NEXT and FINISH. vDrive is now installed.
Activating vDrive Enterprise
vDrive can be started and used without an Enterprise license, in vDrive Basic mode, however there are certain limits, such as:
-
A bucket cannot be shared between two vDrive instances in Basic mode
-
vDrive can only have one bucket configured in Basic mode
-
There is no profile support in Basic mode (feature not yet released)
-
Buckets cannot be mounted to a specific file path in Basic mode, only to a drive letter
-
Bucket cannot be mounted as network drives in Basic mode
When starting vDrive you will be prompted to enter your Activation ID. If you have an Enterprise activation ID, enter it and click Activate. You will now have an Enterprise version og vDrive with all features unlocked.
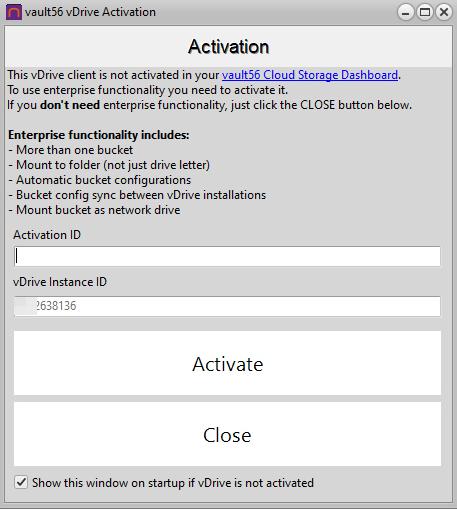
Creating a vDrive Activation Code
You can only create a vDrive activation Code through the web based vault56 Cloud Storage dashboard
If you don't have a vault56 Corporate Account, or if you are an individual that does not belong to a corporate organisation, go to this page to signup for an account.
If you work for an organisation that has a vault56 Corporate Account, ask your administrator to create a vDrive activation ID for you.
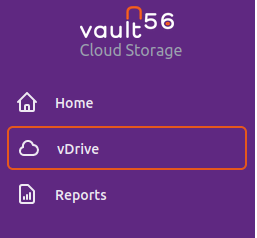
Once logged into the vault56 Cloud Storage Dashboard, click on the vDrive menu:
Then click on "New enterprise license":

Enter a name for your license ("Peter Michells License" for example, if this license is going to be used by Peter Mitchell) and click SAVE. You will now see the vDrive Enterprise license in the list.
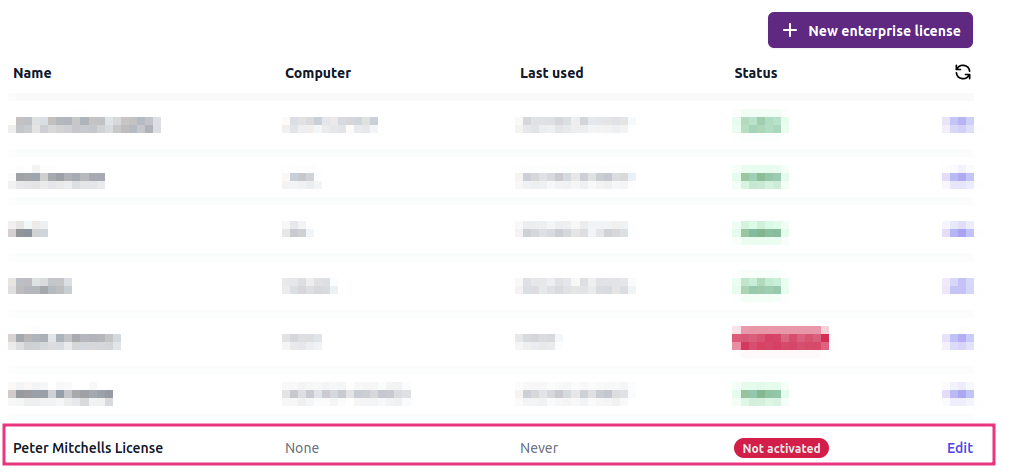
If you click EDIT on Peters license, you will see the activation ID for this specific license.
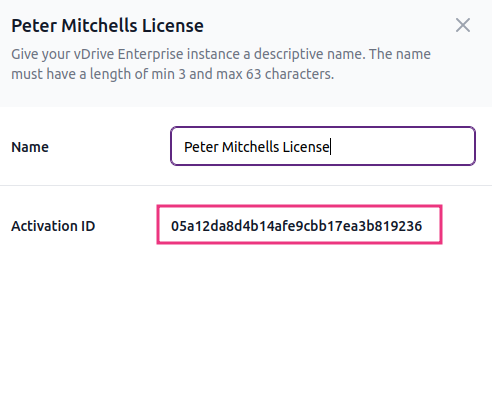
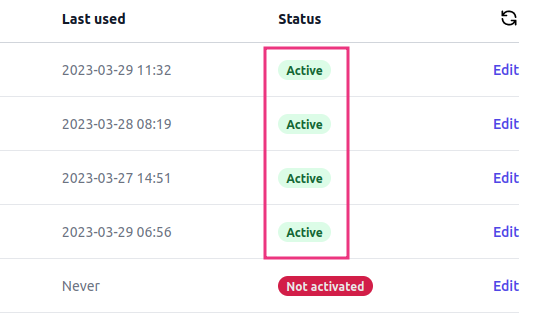
Send this code to the person that should be using it, once they have entered it into vDrive the license will be marked as active.
Manually adding a bucket to vDrive
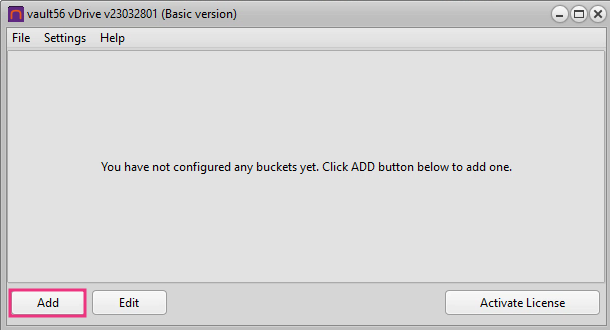
When your vDrive starts for the first time, it has no bucket configurations. Click the ADD button to add a bucket configuration. This bucket configuration information should have been given to you by your company administrator, or if you are an individual not belonging to a company you will have created an access key through the vault56 Cloud Storage Dashboard.
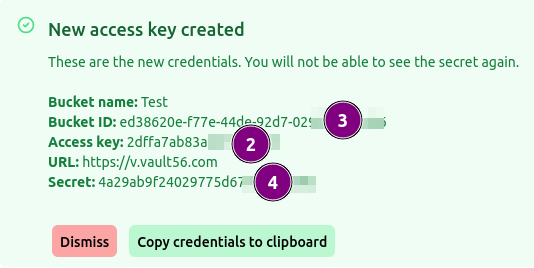
Enter your access key and bucket configuration. See the numbers in the images below for corresponding fields. The Bucket name field in vDrive's configuration can be named to anything, it is just for your own use.
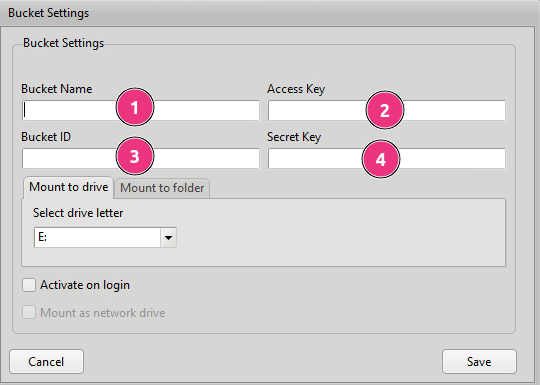
Select a drive letter to connect this bucket to. vDrive tries to detect which drive letters that are already used and show only unused drive letters in the list.
If you want this bucket to be activated when you login to your computer, check the "Activate on login" checkbox.
Click on SAVE to save your bucket configuration.
You will now see your bucket in the bucket list.
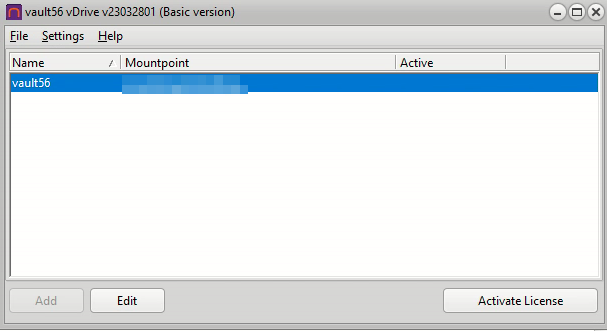
To activate your newly created bucket, please see "Activating and deactivating a bucket".
Activating and Deactivating a bucket
To activate a bucket and connect it to your computer, select the bucket in your bucket list and click the button ACTIVATE to activate your bucket. This option will only be available if the bucket is NOT ALREADY activated on your computer.
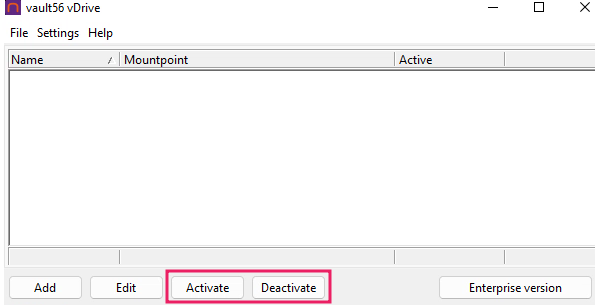
If the bucket configuration is correct, the bucket will be connected to your computer and will open in Windows file explorer.
To deactivate an activated bucket, Select the bucket in your bucket list and click the button DEACTIVATE. This option will only be available if the bucket is already activated.
