Using Cyberduck with vault56 Cloud Storage
-
Download and install Cyberduck
-
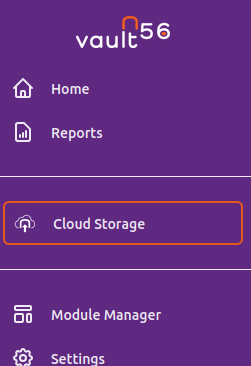
In your vault56 Cloud Storage Dashboard, generate a new access key for use with Cyberduck (it is assumed you have created at least one bucket).


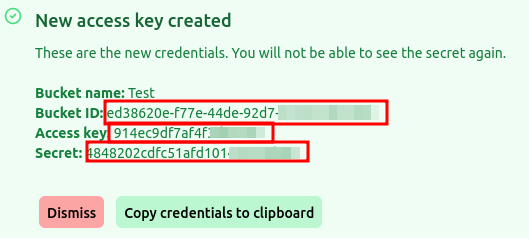
- Your new access key information will now be shown, DO NOT CLICK DISMISS OR CLOSE THE WINDOW UNTIL YOU HAVE COPIED THE INFORMATION. This information will only be shown once, if you close the window before you have copied it into Cyberduck, you will need to delete the access key and create a new access key again.
You need to enter this information later

-
Right click on this link, select SAVE AS and save it on your desktop, then double click on the file to import vault56 Cyberduck profile
-
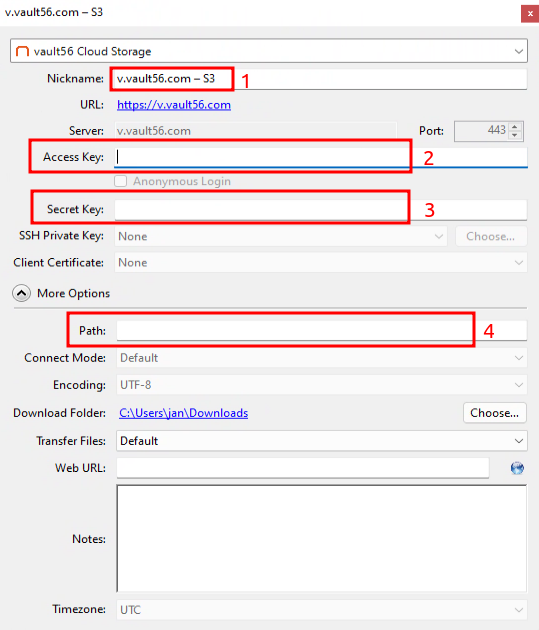
The Cyberduck vault56 configuration window will appear
-
This is a name for your bucket, choose a name you will recognize
-
Enter your access key (see image above)
-
Enter your secret key (see image above)
-
Enter your bucket ID (see image above)

-
Close the Cyberduck configuration window on the red cross in the upper right corner of the configuration window.
-
Now click on the newly created vault56 Cloud Storage profile and drag & drop files into your storage
